For 18c, you may refer to: How to Build 18c RAC - 1 of 4 - Preparing Two Database Servers.
This major step describes how to build shared storage for RAC, in fact, it's for ASM to configure a disk group. This shared storage would go through NAS + iSCSI channel for servicing two RAC nodes.
Assuming that you have installed FreeNAS 9.3 before we open iSCSI service for iSCSI clients which are two nodes of RAC server.
In this major step, we are going to have the following minor steps.
- Check the basic information about this NAS
- Create volume group and volumes for iSCSI
- Set up iSCSI Service
A. Check the basic information about this NAS
- OS: FreeNAS 9.3
- Hostname: primary-nas.example.com (192.168.15.101)
- Number of Disks for iSCSI: 4 disks.
- Space per disk: 20GB.
- Disk Redundancy: RAIDZ2 (≈ RAID 10).
- Number of ZVOL (Extents) for iSCSI service: 2.
- Number of Targets for iSCSI service: 2.
- Space per Target: 16GB.
B. Create volume group and volumes for iSCSI
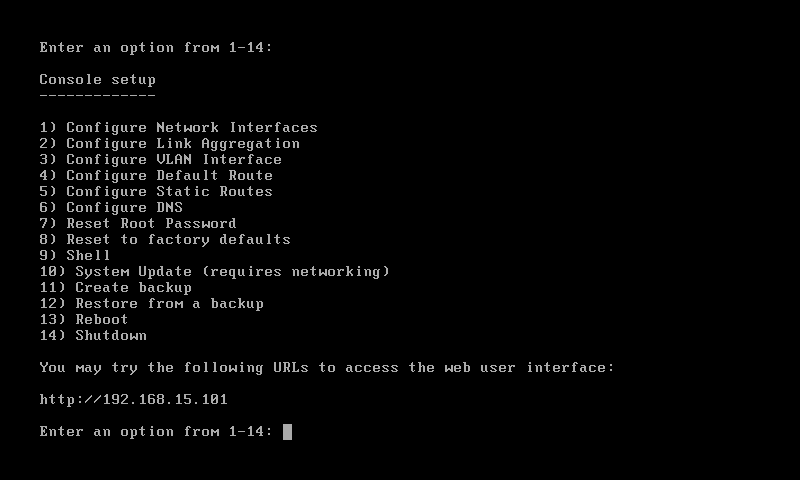
See the IP address (http://192.168.15.101 in this case) of FreeNAS WebGUI indicated on the menu screen.
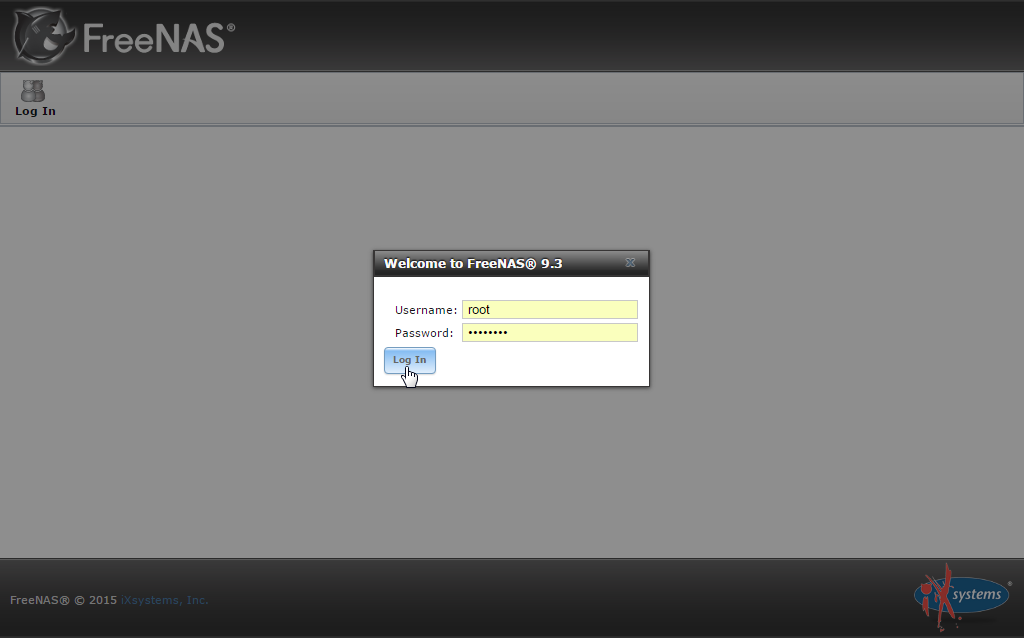
Open your browser to login to FreeNAS WebGUI (i.e. http://192.168.15.101 in this case.)
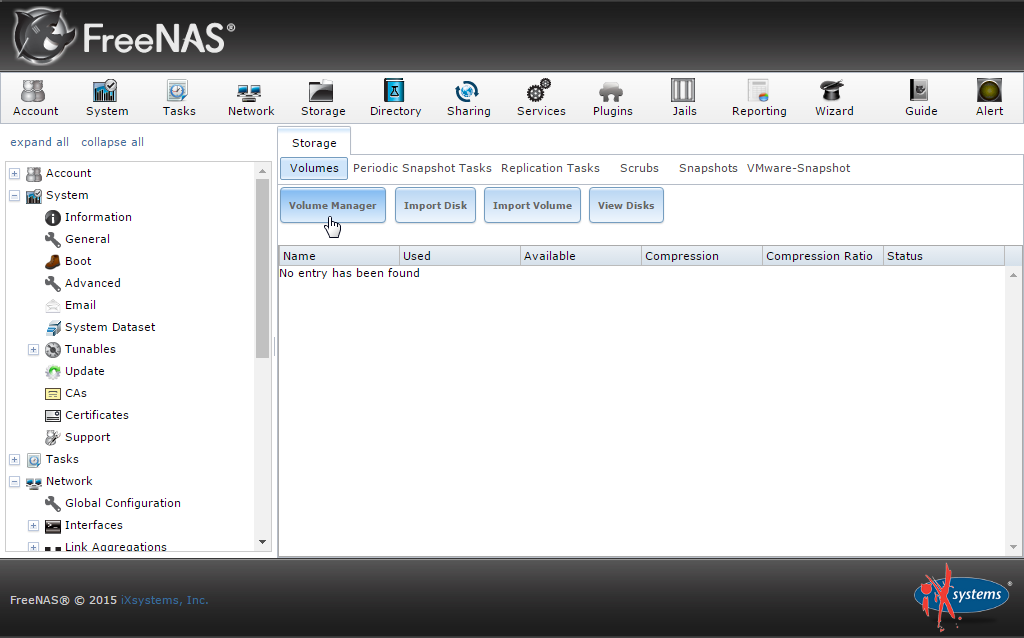
Click Storage > Volume Manager
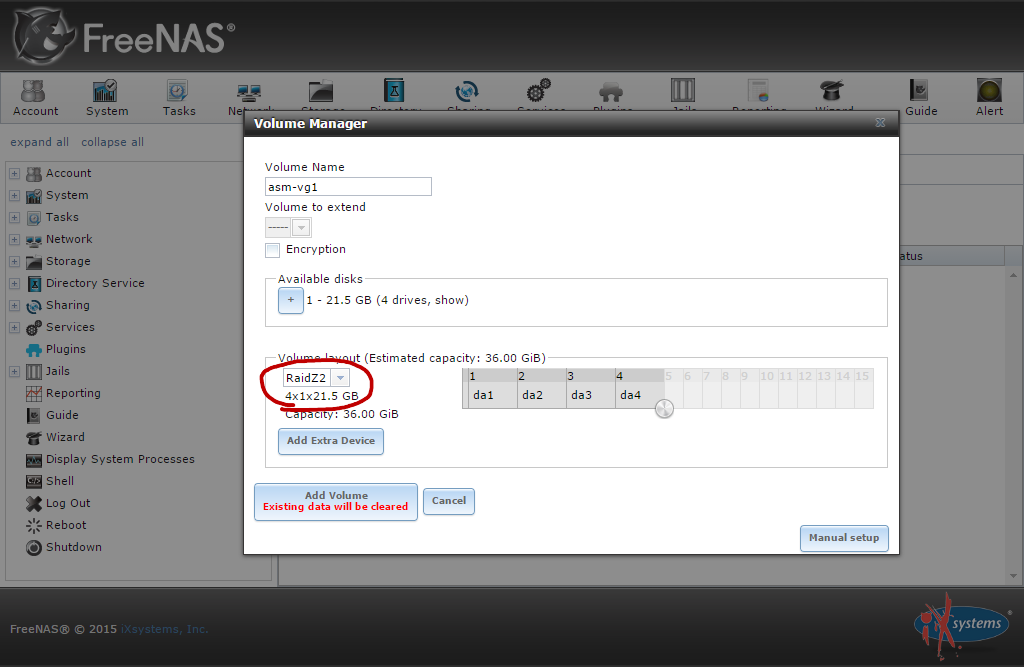
Create a volume group by dragging a 4x1 disk array with RaidZ2
Click Create ZVOL icon for iSCSI extents.
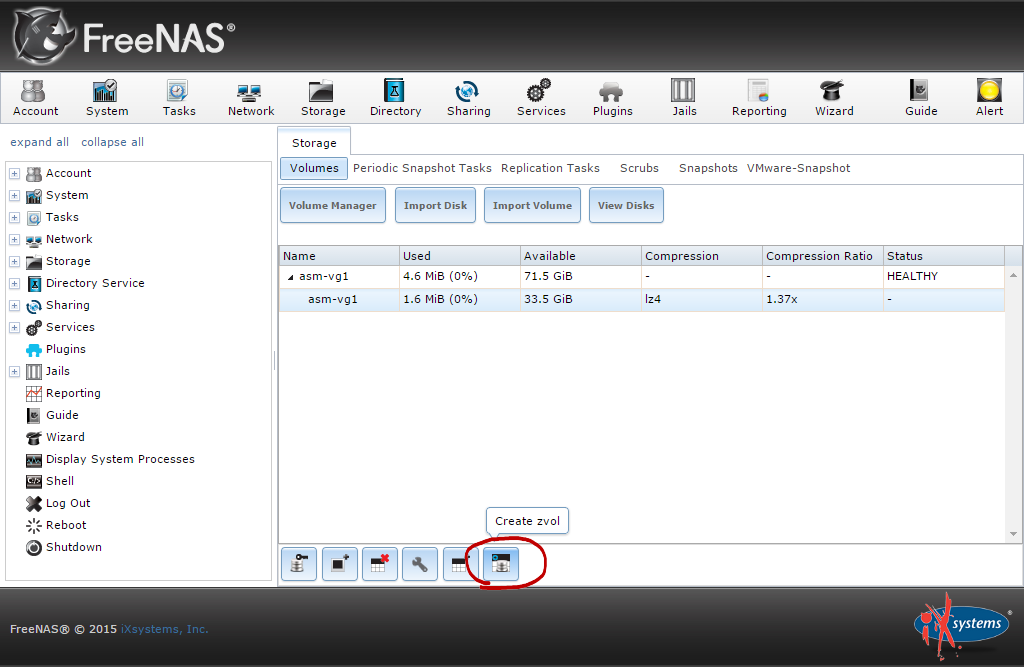
Please notice that the unit of ZVOL must be in GiB, not GB

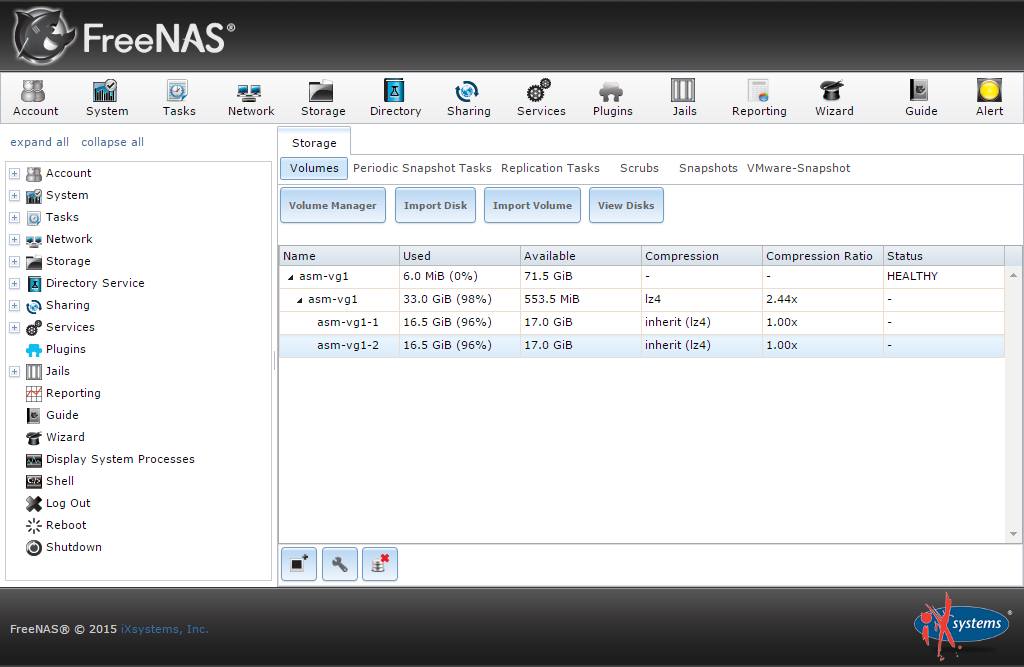
OK, we have created two ZVOL for iSCSI extents.
C. Set up iSCSI Service
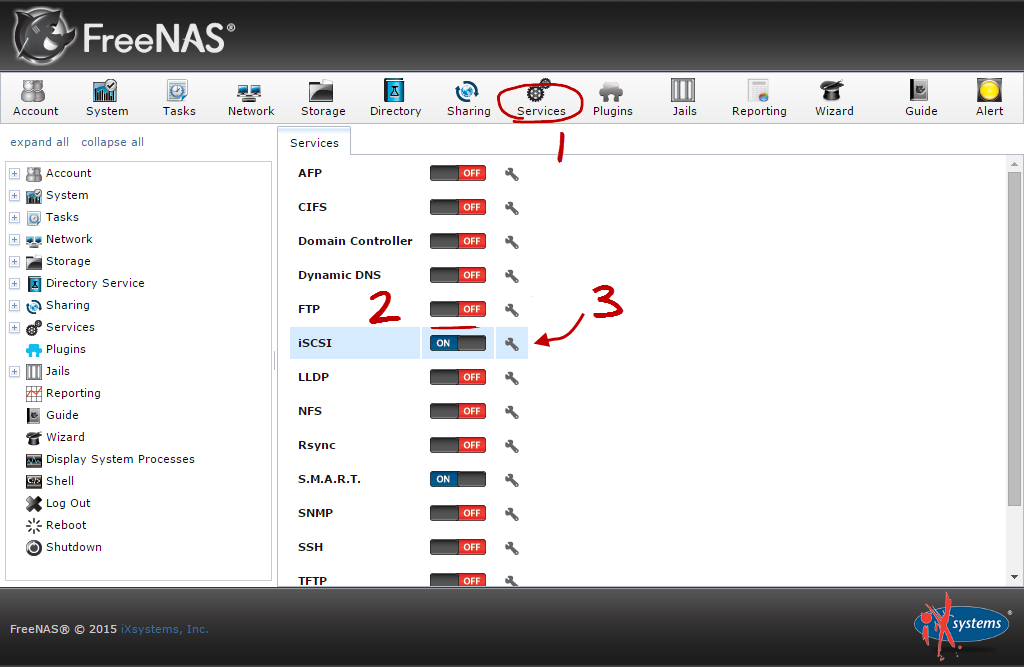
Start iSCSI service:- Click Services.
- Switch iSCSI service ON.
- Click the tool icon on the right side to enter iSCSI setup.
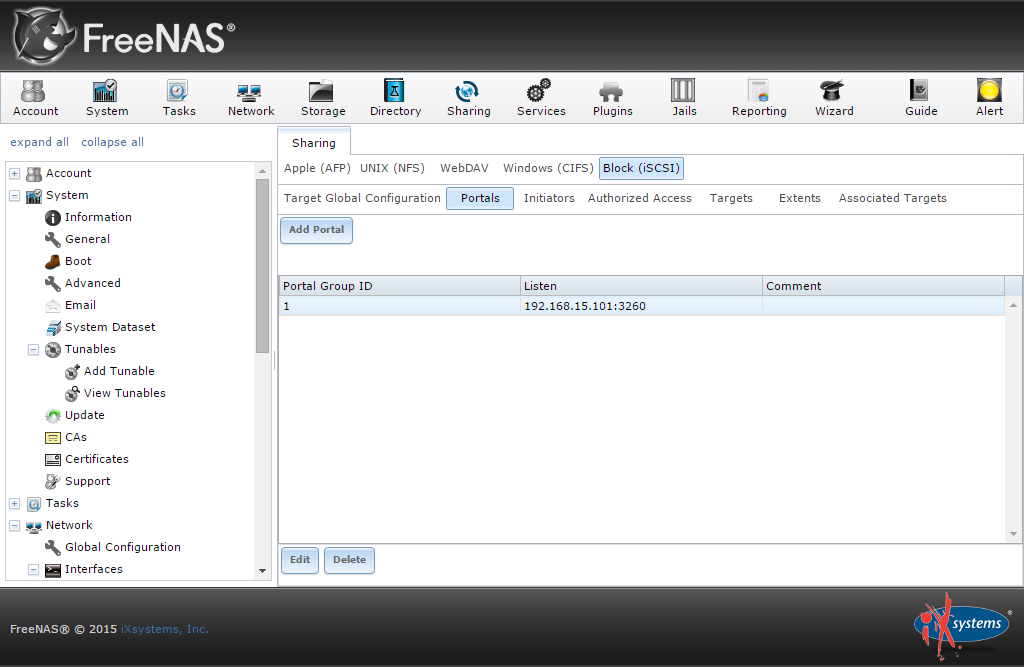
Create a portal for iSCSI clients to access.
Create an initiator for authenticated iSCSI clients.

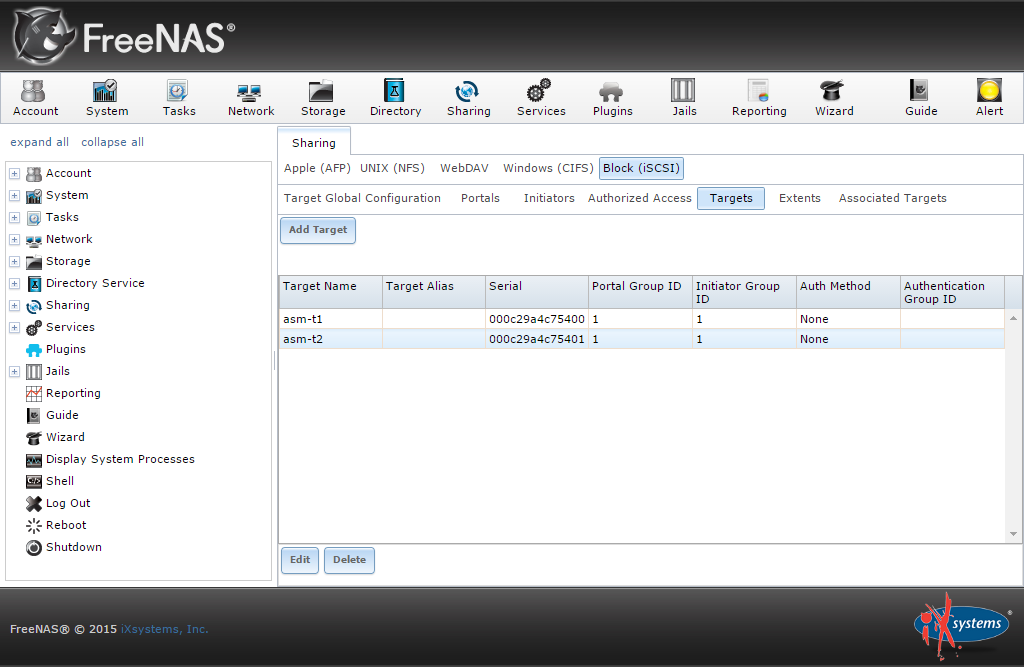
Create two targets asm-t1 and asm-t2.
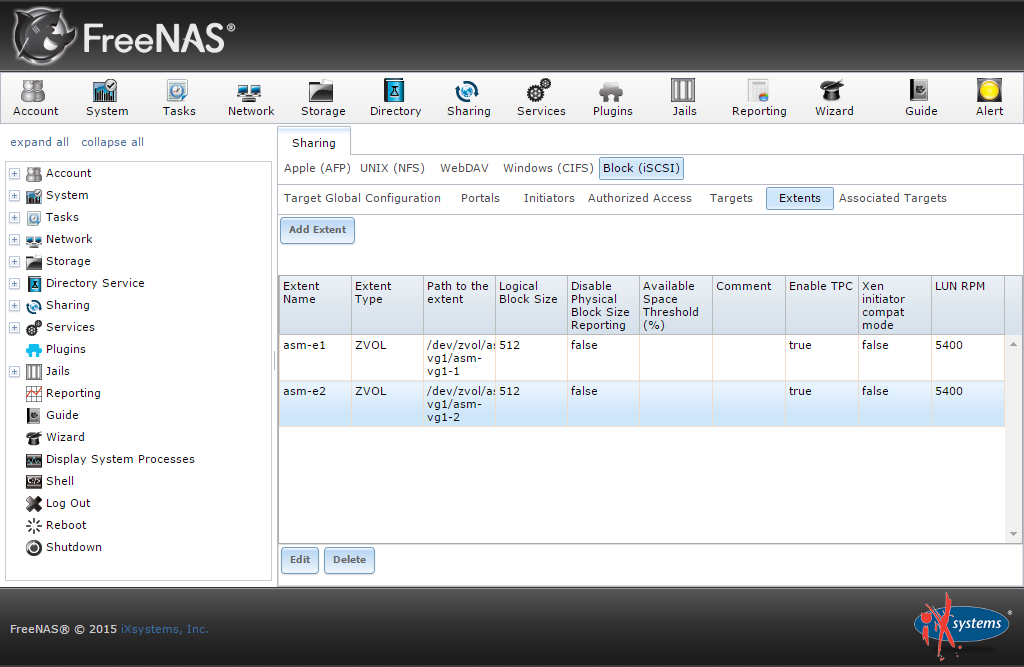
Create two extents asm-e1 and asm-e2 by using previously created ZVOL: asm-vg1-1 and asm-vg1-2.
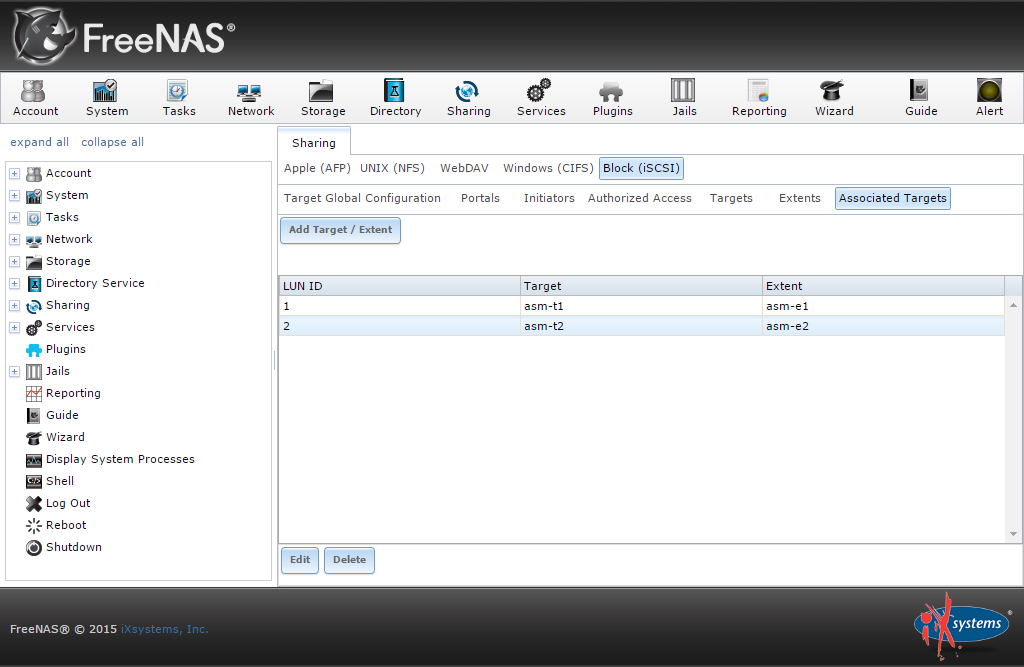
Map two pairs of target and extent.
Here is a concept worth mentioning about: The types of disk array in FreeNAS are categorized as these:
- Stripe = RAID 0 (zero redundancy)
- Mirror = RAID 1 (one redundancy)
- RAIDZ ≈ RAID 5
- RAIDZ2 ≈ RAID 10 (or RAID 1+0)
So far, the shared storage for ASM is ready.