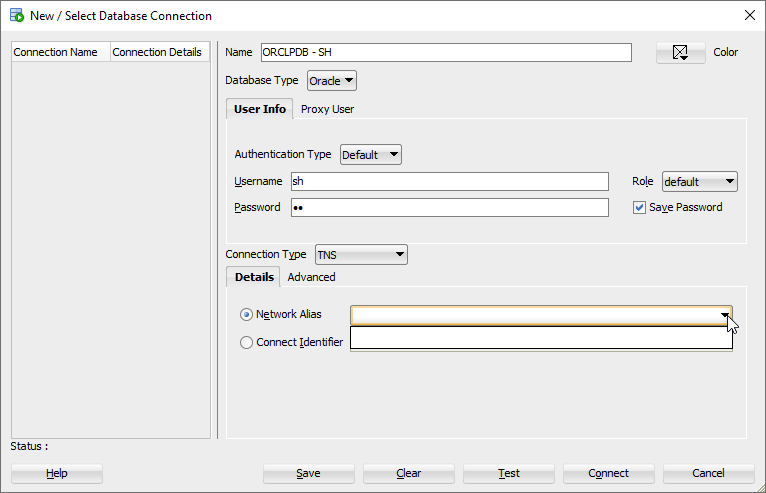
At the first time startup of SQL developer, you may want to new a connection to start to use the tool. But sometimes, you might see no TNS entries in "Network Alias" when you choose "TNS" (Local Naming) to make the connection.
Normally, it's because that there's no ORACLE_HOME or TNS_ADMIN environment variable has been set in your operating system, so SQL developer has no way to find a proper tnsnames.ora to use.
This could happen when you use Oracle instant client as your connection base in this machine.
Solutions
There're 2 ways to solve it.
No matter which way you want to do, please make sure that there's a valid tnsnames.ora file under TNS_ADMIN. Still, if there's no content in tnsnames.ora, then you see nothing in "Network Alias".
Set TNS_ADMIN in Operating System
To solve it, you can simply set TNS_ADMIN path in your environment, then close the program, re-open SQL developer.
Set TNS_ADMIN in SQL Developer
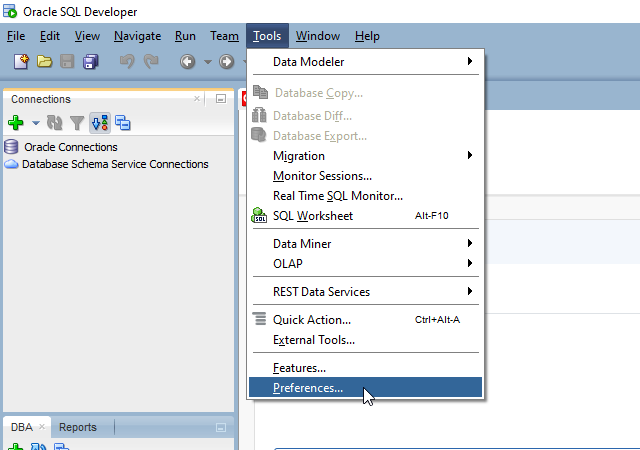
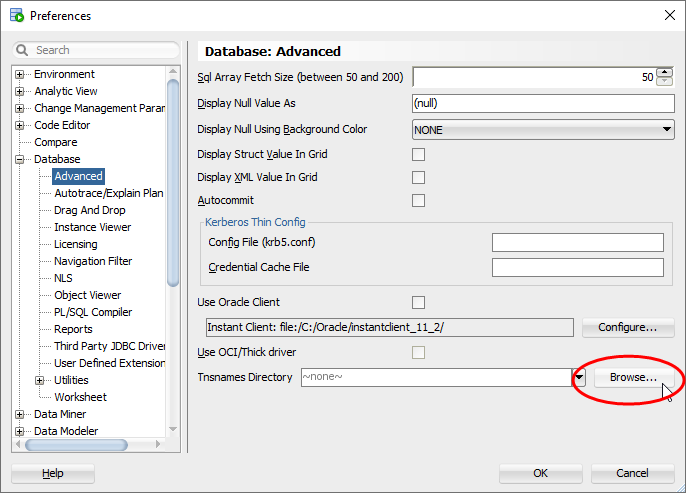
To set ORACLE_HOME and TNS_ADMIN path in SQL developer, we should go for the function menu "Tools" > "Preferences".
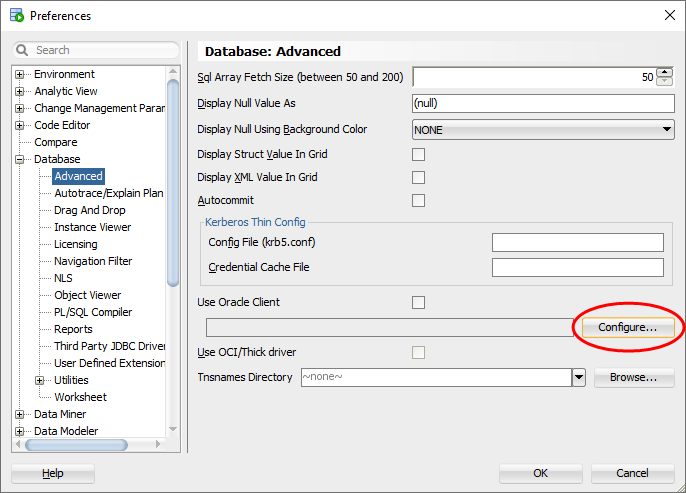
Next, we expand "Database" category and click on "Advanced" item.
To set a proper Oracle client, please click Configure.
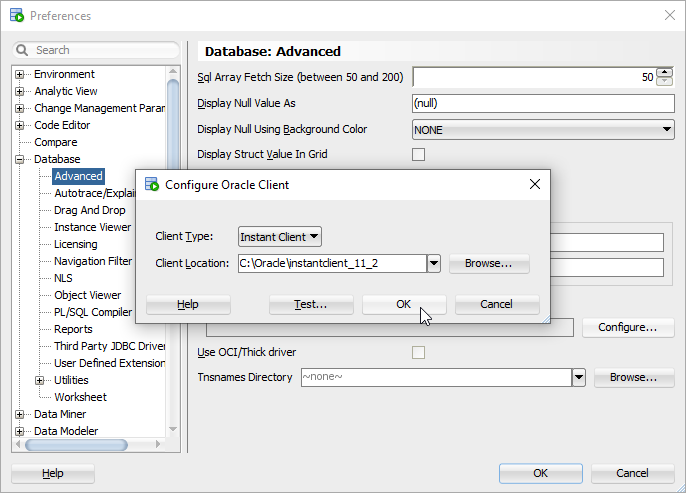
Now, we have 2 kinds of client can be set, one is Oracle Client, the other is Oracle instant client.
Instant Client
Choose "Instant Client" for "Client Type" and enter the home path for "Client Location", then click Test to check if it's valid.
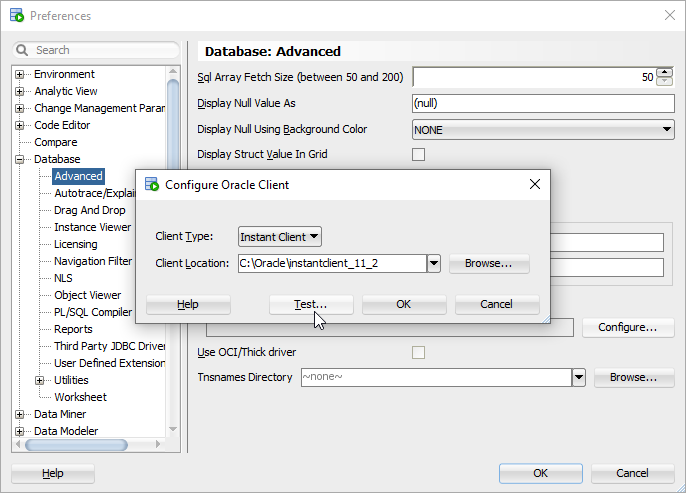
If it looks good, you can safely click OK to confirm the change.
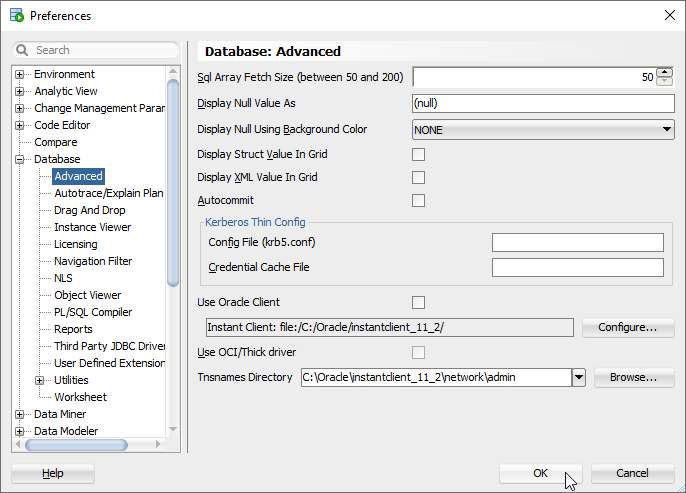
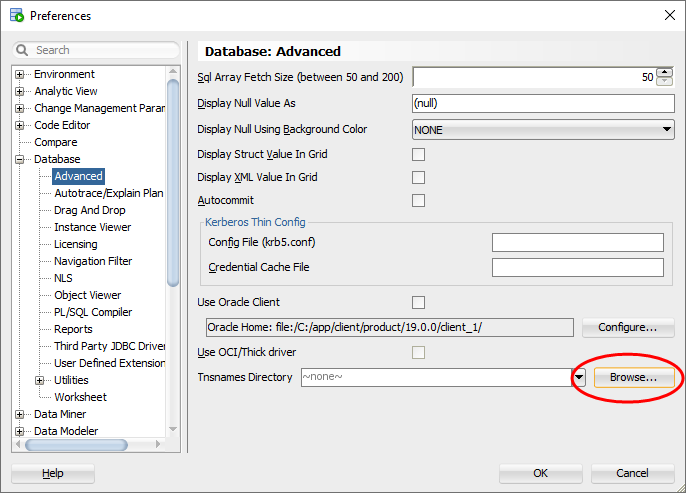
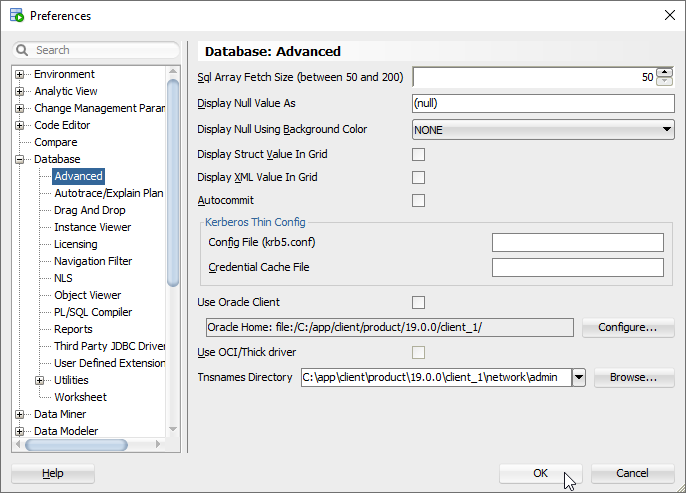
We turn to set TNS_ADMIN directory.
If everything looks good, please click OK to confirm all settings.
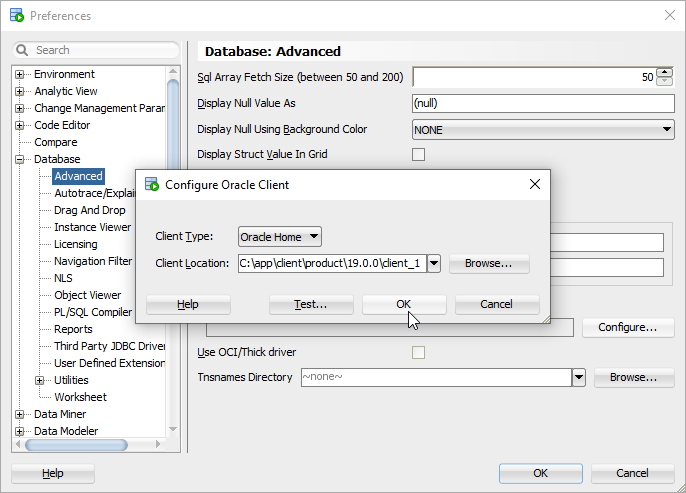
Oracle Client
Choose "Oracle Home" for "Client Type" and enter the home path for "Client Location", then click Test to check if it's valid.

If it looks good, you can safely click OK to confirm the change.
We turn to set TNS_ADMIN directory.
If everything looks good, please click OK to confirm all settings.
Now, you can create a new connection in SQL developer. It should be all right now.