Since we have well prepared two database servers for the RAC database in the previous post, the only job we should do in this post is to install Grid infrastructure.
There're two parts in this post.
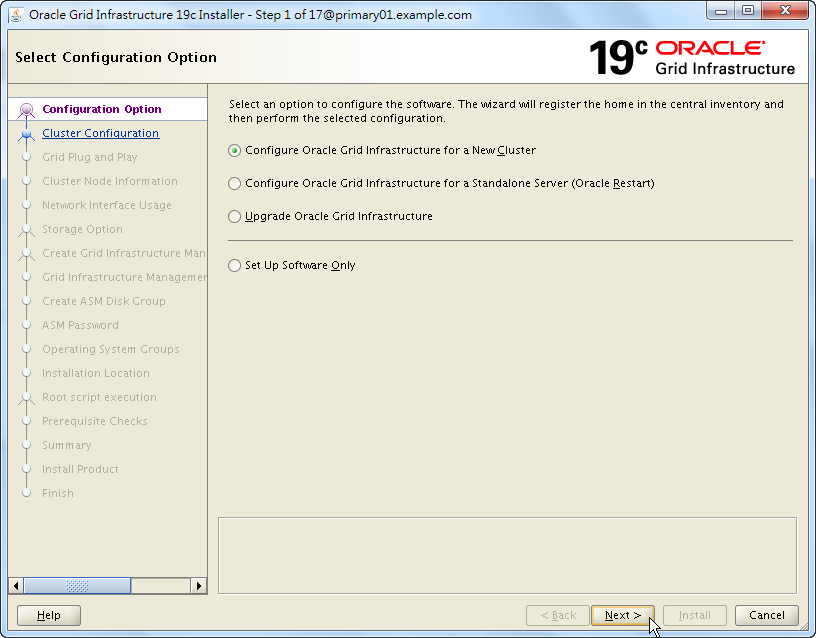
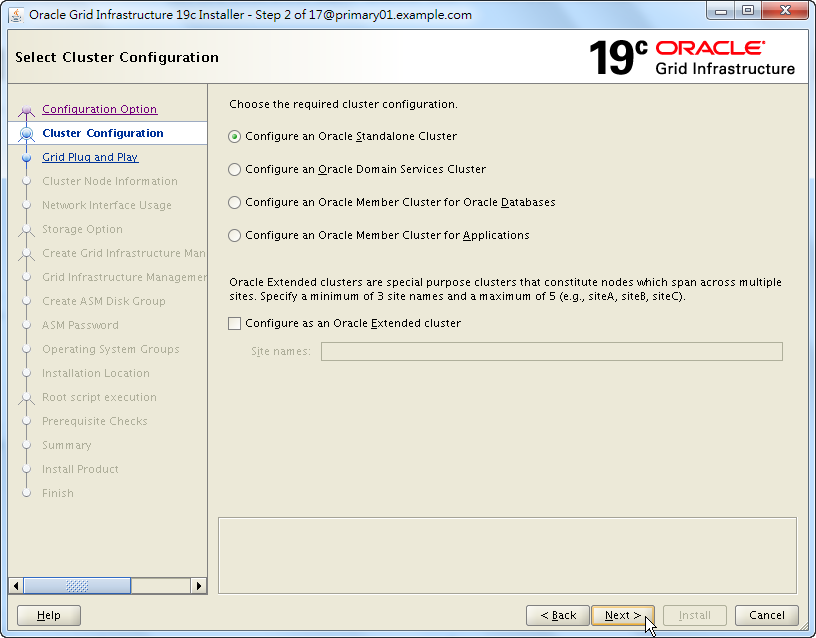
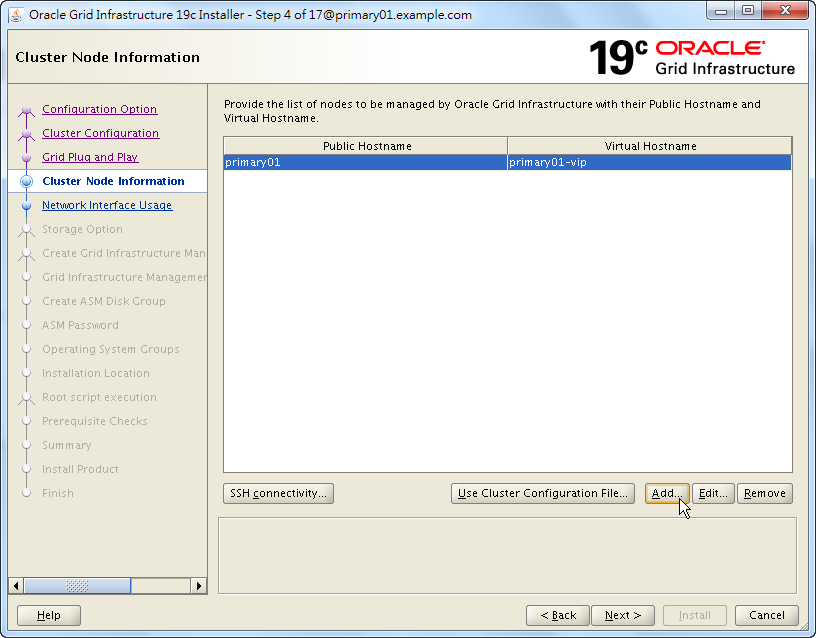
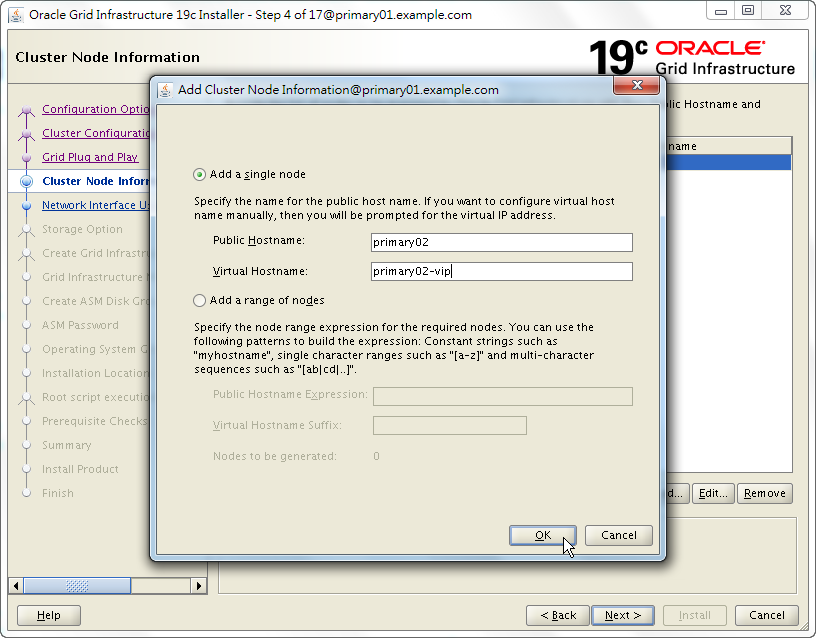
A. Grid Installation
[grid@primary01 ~]$ $ORACLE_HOME/gridSetup.sh

If you see the following error dialog, it may be because of the newer OpenSSH 8.x.
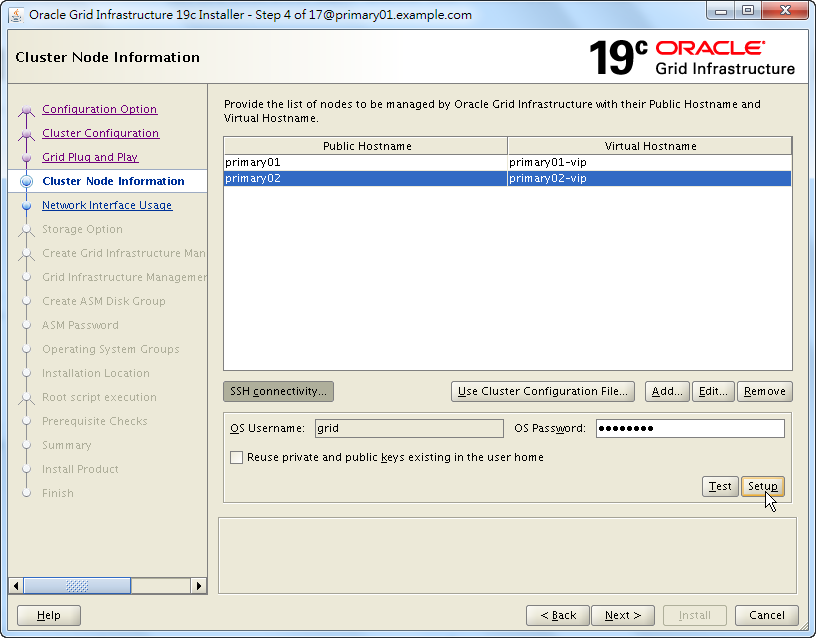
INS-06006 Passwordless SSH connectivity not set up between the following node(s)
You should fix scp for INS-06006 problem during installation.

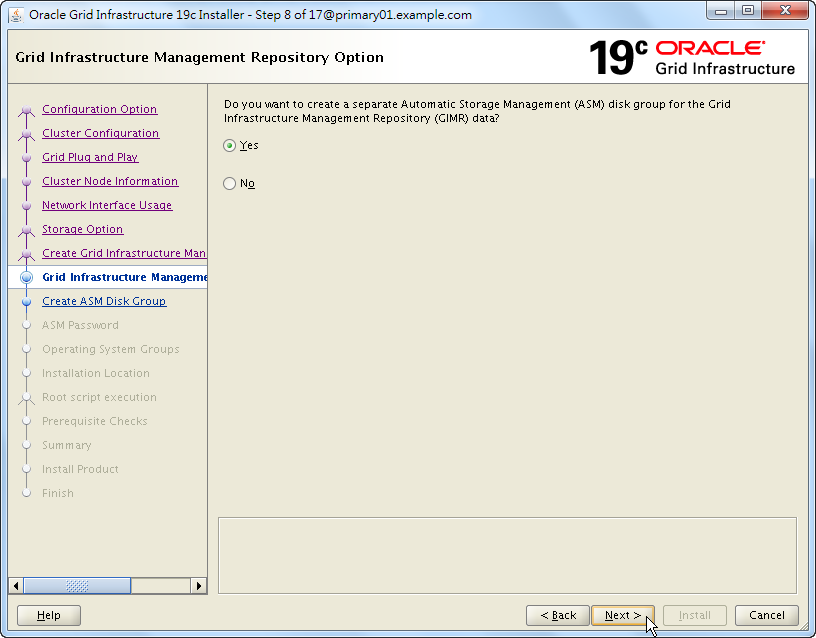
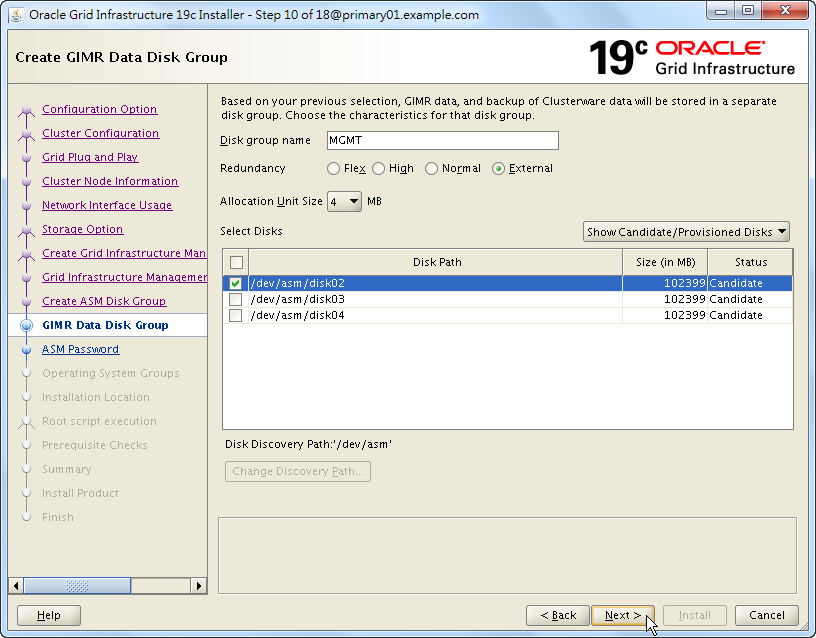
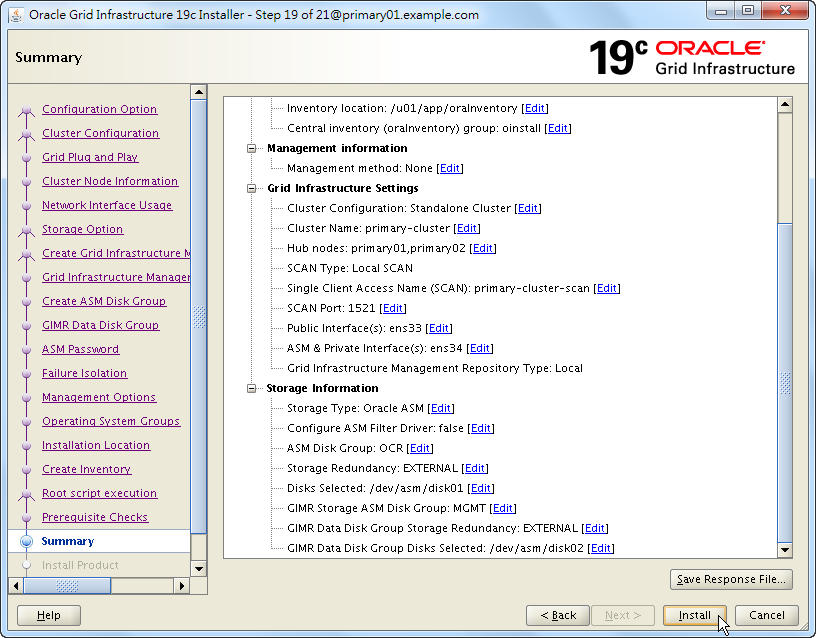
GIMR is optional for Grid infrastructure 19c, you may skip it in the following step, or remove MGMT DB after installing.
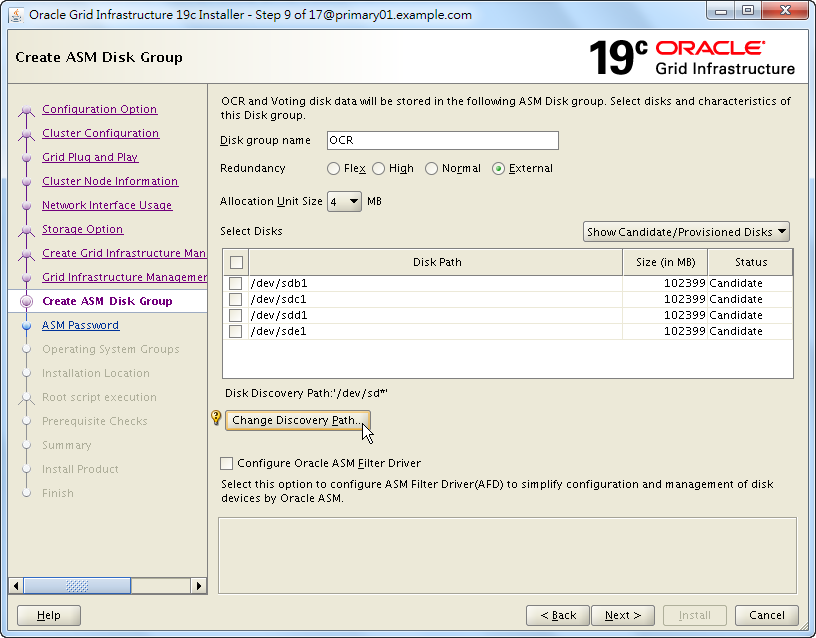
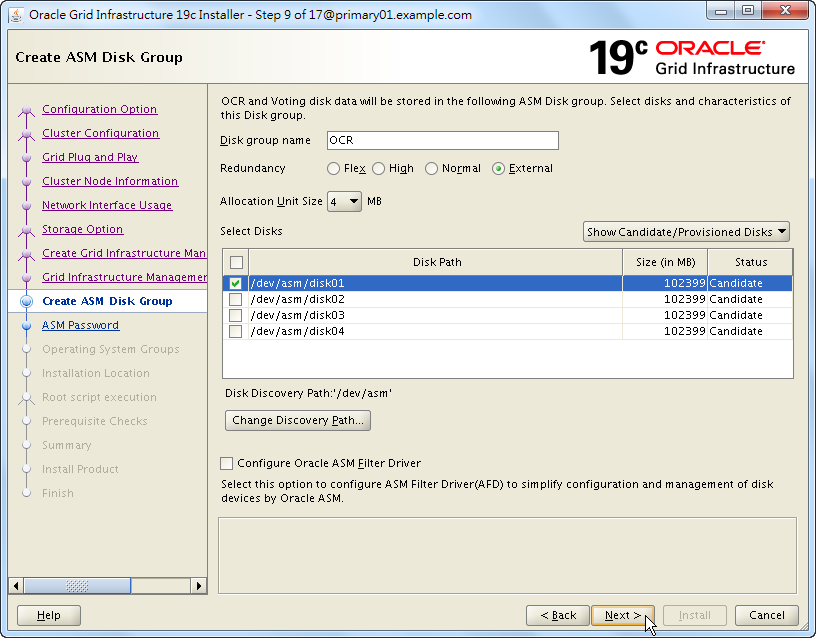
If you choose NORMAL redundancy for this disk group, please beware of the error: INS-30510: Insuffient number of ASM disks selected.

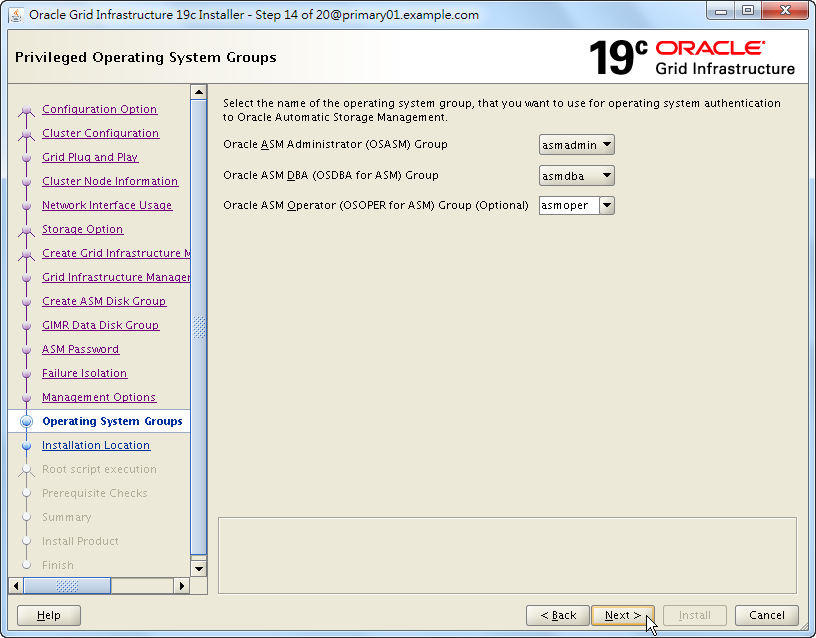
For accessing the shared storage, those ASM disks should belong to ASM administrator (OSASM) group, which is asmadmin in this case. I have talked about it in persistent naming of ASM disks.
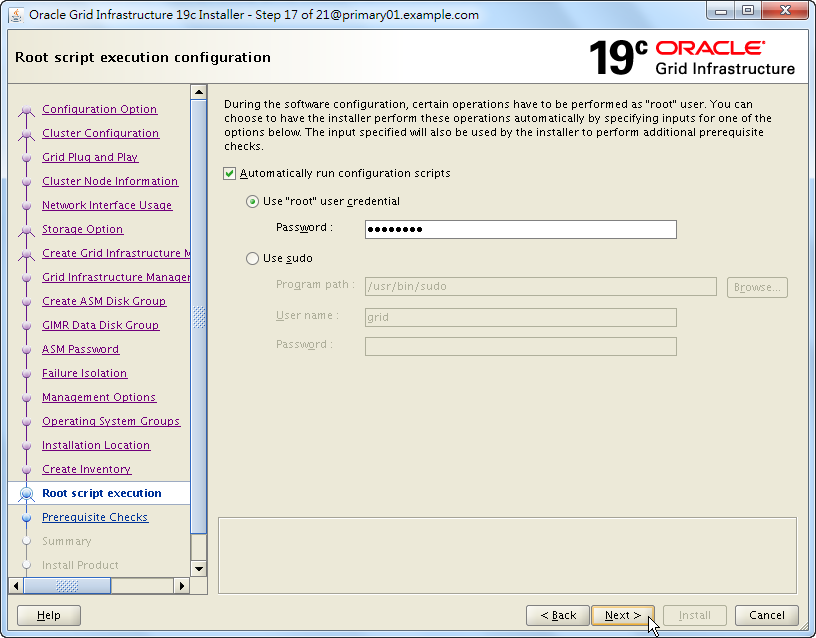
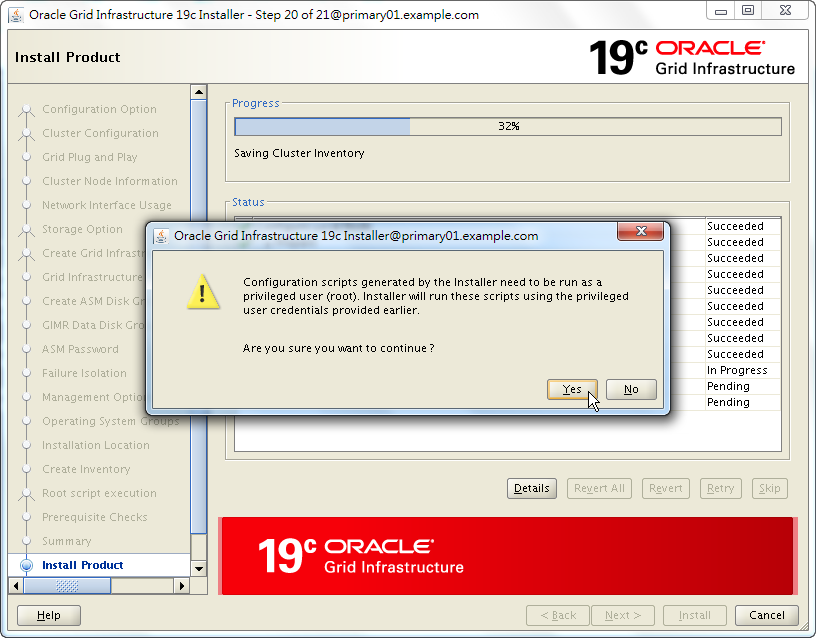
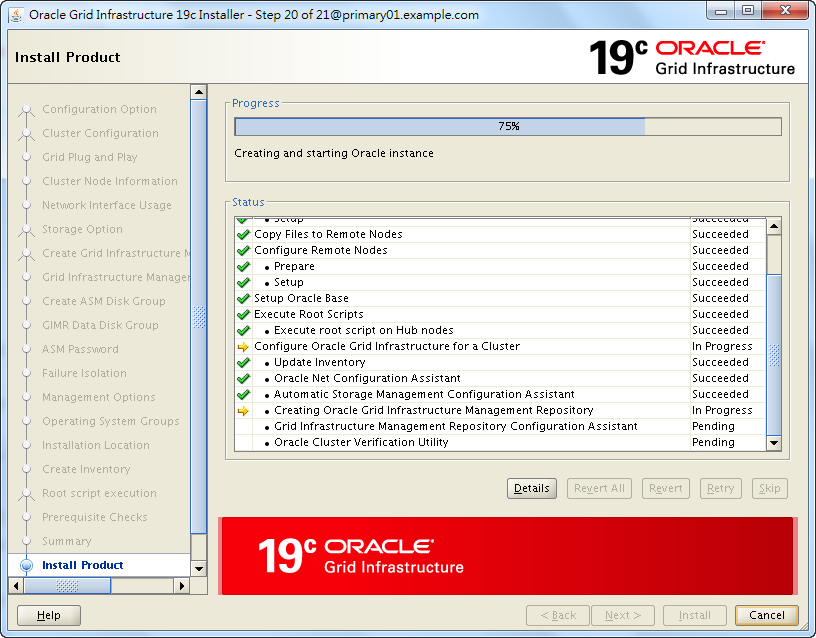
In this case, I chose to run orainstRoot.sh and root.sh on all nodes automatically.
For AIX platform, I suggest that you do NOT choose automatically run configuration scripts, try run them manually.
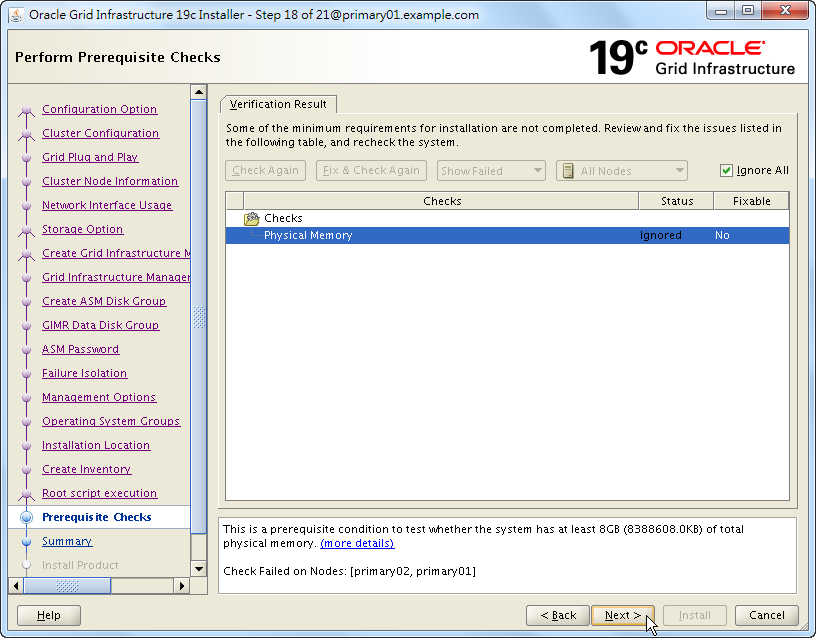
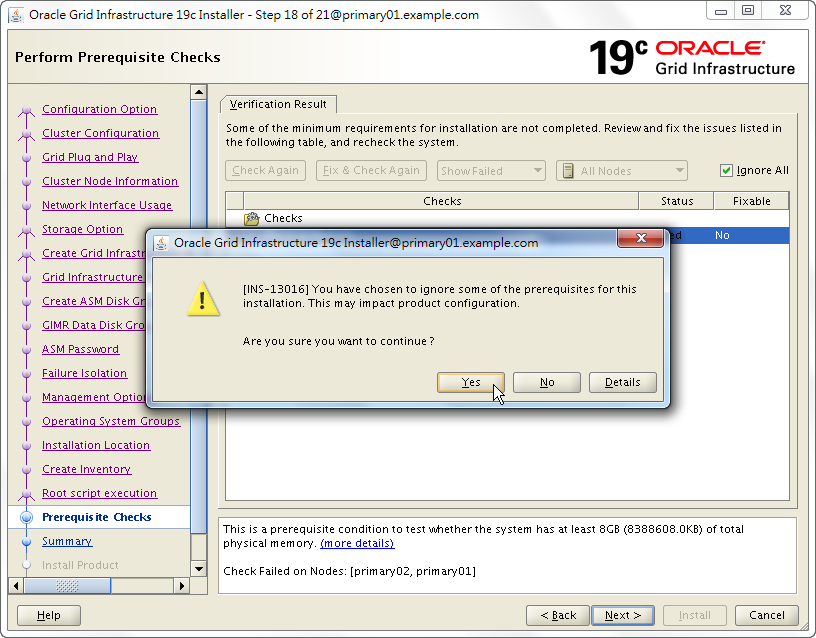


An item failed to pass Oracle Cluster Verification Utility (CLUVFY).
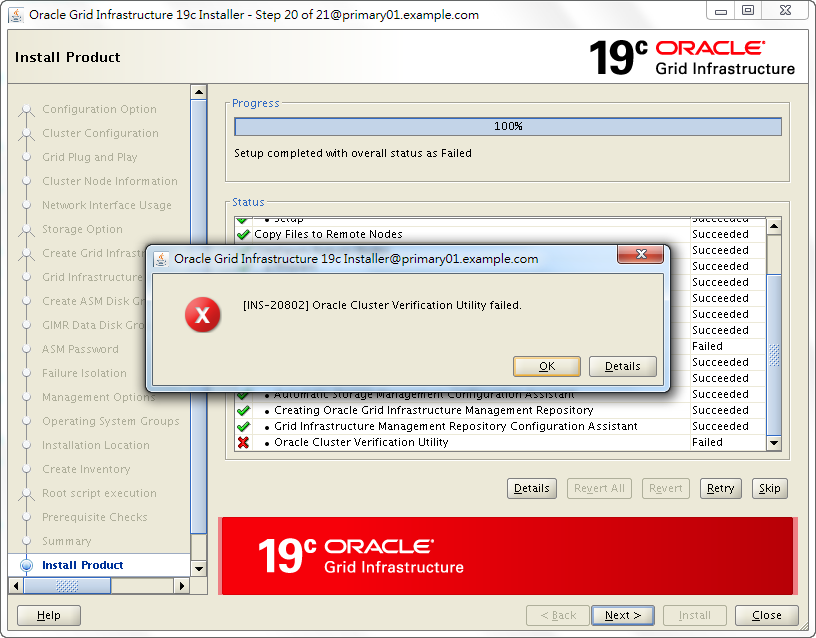
Let's see what just happened.
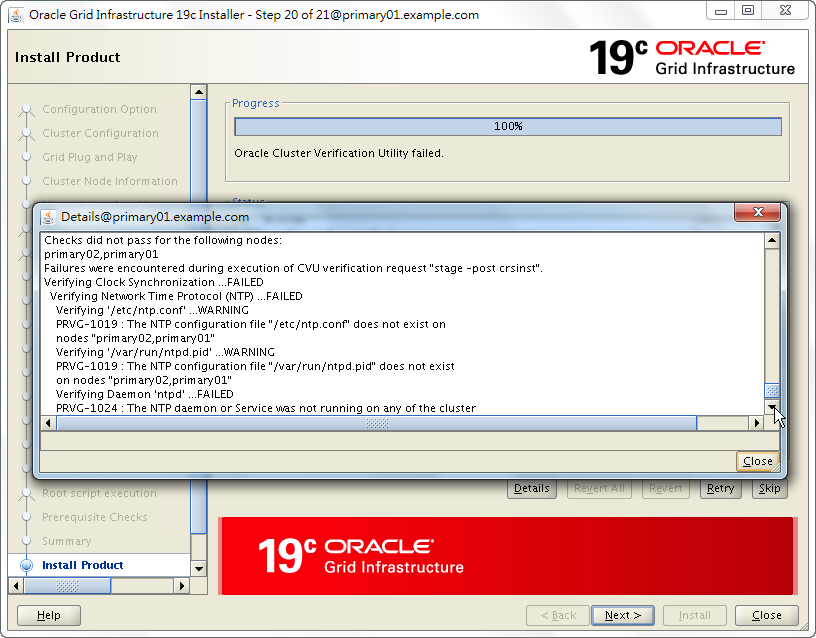
As we can see, it's a clock synchronization check. Since we use chrony instead of NTP to synchronize time, we are going to skip the error.
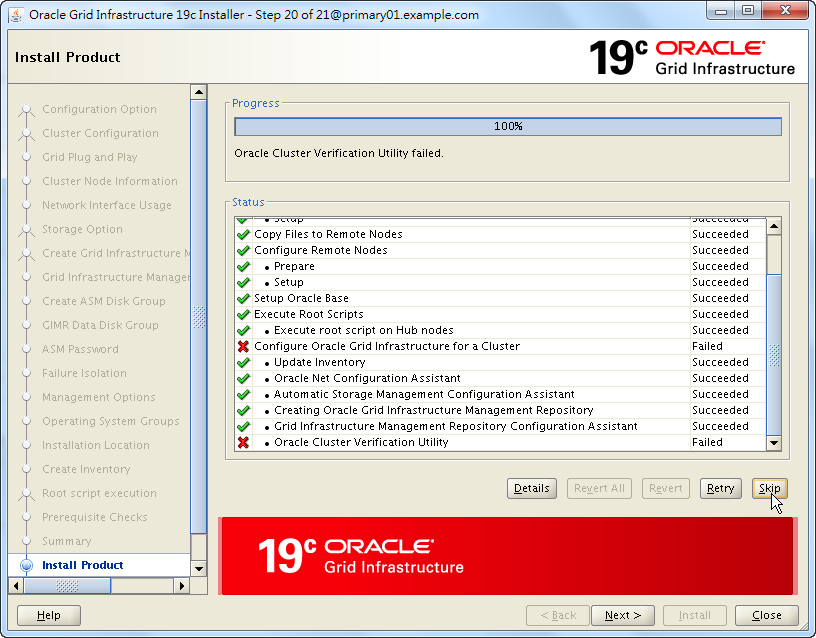
By the way, I also used chrony in Grid infrastructure 18c installation on OEL 7, but I didn't see any error. Is it a bug of grid infra 19.3 on OEL 8.1? I heard about the bug has been fixed since 12.2.
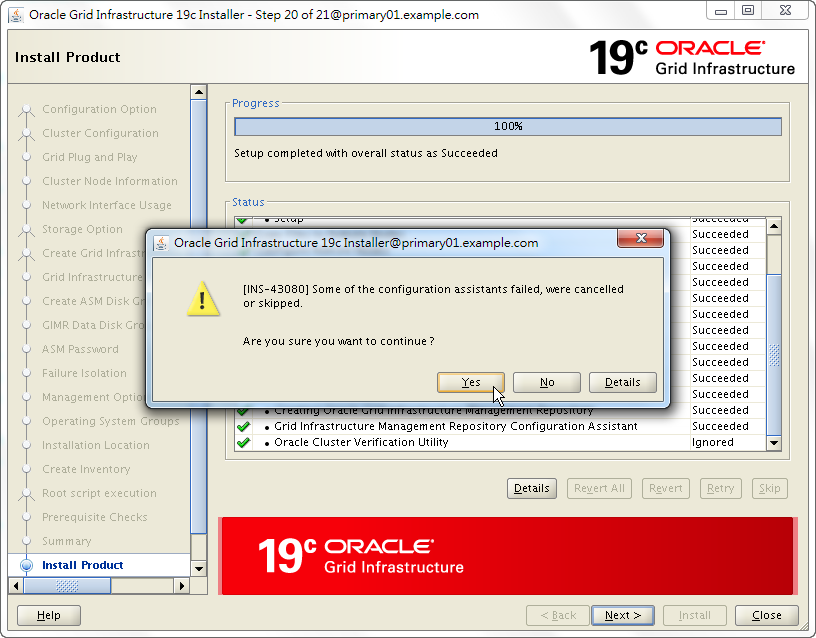

Grid infrastructure has been installed.
Run Configuration Script Manually
For your reference, if you chose to run root.sh manually, OUI will remind you to do so during installation.
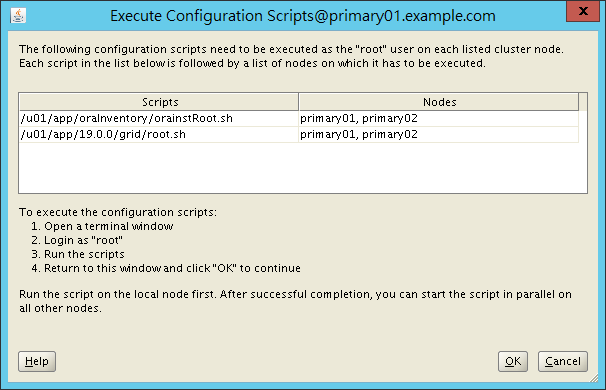
Then we should execute them one after another. For example, in a two-nodes RAC, we should do them as below:
orainstRoot.sh
Node 1
[root@primary01 ~]# /u01/app/oraInventory/orainstRoot.sh

Changing permissions of /u01/app/oraInventory.

Adding read,write permissions for group.

Removing read,write,execute permissions for world.


Changing groupname of /u01/app/oraInventory to oinstall.

The execution of the script is complete.
Node 2
[root@primary02 ~]# /u01/app/oraInventory/orainstRoot.sh

Changing permissions of /u01/app/oraInventory.

Adding read,write permissions for group.

Removing read,write,execute permissions for world.


Changing groupname of /u01/app/oraInventory to oinstall.

The execution of the script is complete.
root.sh
Node 1
[root@primary01 ~]# /u01/app/19.0.0/grid/root.sh

Performing root user operation.


The following environment variables are set as:

    ORACLE_OWNER= grid

    ORACLE_HOME=  /u01/app/19.0.0/grid


Enter the full pathname of the local bin directory: [/usr/local/bin]:

   Copying dbhome to /usr/local/bin ...

   Copying oraenv to /usr/local/bin ...

   Copying coraenv to /usr/local/bin ...


Creating /etc/oratab file...

Entries will be added to the /etc/oratab file as needed by

Database Configuration Assistant when a database is created

Finished running generic part of root script.

Now product-specific root actions will be performed.

Relinking oracle with rac_on option

Using configuration parameter file: /u01/app/19.0.0/grid/crs/install/crsconfig_params

The log of current session can be found at:

  /u01/app/grid/crsdata/primary01/crsconfig/rootcrs_primary01_2020-07-17_11-58-55AM.log

2020/07/17 11:59:01 CLSRSC-594: Executing installation step 1 of 19: 'SetupTFA'.

2020/07/17 11:59:01 CLSRSC-594: Executing installation step 2 of 19: 'ValidateEnv'.

2020/07/17 11:59:02 CLSRSC-363: User ignored prerequisites during installation

2020/07/17 11:59:02 CLSRSC-594: Executing installation step 3 of 19: 'CheckFirstNode'.

2020/07/17 11:59:03 CLSRSC-594: Executing installation step 4 of 19: 'GenSiteGUIDs'.

2020/07/17 11:59:04 CLSRSC-594: Executing installation step 5 of 19: 'SetupOSD'.

2020/07/17 11:59:04 CLSRSC-594: Executing installation step 6 of 19: 'CheckCRSConfig'.

2020/07/17 11:59:04 CLSRSC-594: Executing installation step 7 of 19: 'SetupLocalGPNP'.

2020/07/17 11:59:18 CLSRSC-594: Executing installation step 8 of 19: 'CreateRootCert'.

2020/07/17 11:59:22 CLSRSC-594: Executing installation step 9 of 19: 'ConfigOLR'.

2020/07/17 11:59:25 CLSRSC-4002: Successfully installed Oracle Trace File Analyzer (TFA) Collector.

2020/07/17 11:59:34 CLSRSC-594: Executing installation step 10 of 19: 'ConfigCHMOS'.

2020/07/17 11:59:34 CLSRSC-594: Executing installation step 11 of 19: 'CreateOHASD'.

2020/07/17 11:59:39 CLSRSC-594: Executing installation step 12 of 19: 'ConfigOHASD'.

2020/07/17 11:59:39 CLSRSC-330: Adding Clusterware entries to file 'oracle-ohasd.service'

2020/07/17 12:00:00 CLSRSC-594: Executing installation step 13 of 19: 'InstallAFD'.

2020/07/17 12:00:04 CLSRSC-594: Executing installation step 14 of 19: 'InstallACFS'.

2020/07/17 12:00:09 CLSRSC-594: Executing installation step 15 of 19: 'InstallKA'.

2020/07/17 12:00:13 CLSRSC-594: Executing installation step 16 of 19: 'InitConfig'.


ASM has been created and started successfully.


[DBT-30001] Disk groups created successfully. Check /u01/app/grid/cfgtoollogs/asmca/asmca-200717PM120043.log for details.


2020/07/17 12:01:34 CLSRSC-482: Running command: '/u01/app/19.0.0/grid/bin/ocrconfig -upgrade grid oinstall'

CRS-4256: Updating the profile

Successful addition of voting disk 7af6c18915ec4fa1bf9b3978a47907fc.

Successful addition of voting disk 4f4b6bea94654fd2bf20742a7bc6331c.

Successful addition of voting disk 7fa5a74260a64f24bfe9e6a4b4fb2f76.

Successfully replaced voting disk group with +OCR.

CRS-4256: Updating the profile

CRS-4266: Voting file(s) successfully replaced

##  STATE    File Universal Id                File Name Disk group

--  -----    -----------------                --------- ---------

 1. ONLINE   7af6c18915ec4fa1bf9b3978a47907fc (/dev/asm/disk01) [OCR]

 2. ONLINE   4f4b6bea94654fd2bf20742a7bc6331c (/dev/asm/disk02) [OCR]

 3. ONLINE   7fa5a74260a64f24bfe9e6a4b4fb2f76 (/dev/asm/disk03) [OCR]

Located 3 voting disk(s).

2020/07/17 12:02:59 CLSRSC-594: Executing installation step 17 of 19: 'StartCluster'.

2020/07/17 12:04:06 CLSRSC-343: Successfully started Oracle Clusterware stack

2020/07/17 12:04:06 CLSRSC-594: Executing installation step 18 of 19: 'ConfigNode'.

2020/07/17 12:05:47 CLSRSC-594: Executing installation step 19 of 19: 'PostConfig'.

2020/07/17 12:06:20 CLSRSC-325: Configure Oracle Grid Infrastructure for a Cluster ... succeeded
Node 2
[root@primary02 ~]# /u01/app/19.0.0/grid/root.sh

Performing root user operation.


The following environment variables are set as:

    ORACLE_OWNER= grid

    ORACLE_HOME=  /u01/app/19.0.0/grid


Enter the full pathname of the local bin directory: [/usr/local/bin]:

   Copying dbhome to /usr/local/bin ...

   Copying oraenv to /usr/local/bin ...

   Copying coraenv to /usr/local/bin ...


Creating /etc/oratab file...

Entries will be added to the /etc/oratab file as needed by

Database Configuration Assistant when a database is created

Finished running generic part of root script.

Now product-specific root actions will be performed.

Relinking oracle with rac_on option

Using configuration parameter file: /u01/app/19.0.0/grid/crs/install/crsconfig_params

The log of current session can be found at:

  /u01/app/grid/crsdata/primary02/crsconfig/rootcrs_primary02_2020-07-17_12-29-33AM.log

2020/07/17 12:29:36 CLSRSC-594: Executing installation step 1 of 19: 'SetupTFA'.

2020/07/17 12:29:36 CLSRSC-594: Executing installation step 2 of 19: 'ValidateEnv'.

2020/07/17 12:29:36 CLSRSC-363: User ignored prerequisites during installation

2020/07/17 12:29:36 CLSRSC-594: Executing installation step 3 of 19: 'CheckFirstNode'.

2020/07/17 12:29:37 CLSRSC-594: Executing installation step 4 of 19: 'GenSiteGUIDs'.

2020/07/17 12:29:37 CLSRSC-594: Executing installation step 5 of 19: 'SetupOSD'.

2020/07/17 12:29:37 CLSRSC-594: Executing installation step 6 of 19: 'CheckCRSConfig'.

2020/07/17 12:29:38 CLSRSC-594: Executing installation step 7 of 19: 'SetupLocalGPNP'.

2020/07/17 12:29:39 CLSRSC-594: Executing installation step 8 of 19: 'CreateRootCert'.

2020/07/17 12:29:39 CLSRSC-594: Executing installation step 9 of 19: 'ConfigOLR'.

2020/07/17 12:29:47 CLSRSC-594: Executing installation step 10 of 19: 'ConfigCHMOS'.

2020/07/17 12:29:47 CLSRSC-594: Executing installation step 11 of 19: 'CreateOHASD'.

2020/07/17 12:29:48 CLSRSC-594: Executing installation step 12 of 19: 'ConfigOHASD'.

2020/07/17 12:29:48 CLSRSC-330: Adding Clusterware entries to file 'oracle-ohasd.service'

2020/07/17 12:29:59 CLSRSC-4002: Successfully installed Oracle Trace File Analyzer (TFA) Collector.

2020/07/17 12:30:06 CLSRSC-594: Executing installation step 13 of 19: 'InstallAFD'.

2020/07/17 12:30:07 CLSRSC-594: Executing installation step 14 of 19: 'InstallACFS'.

2020/07/17 12:30:08 CLSRSC-594: Executing installation step 15 of 19: 'InstallKA'.

2020/07/17 12:30:09 CLSRSC-594: Executing installation step 16 of 19: 'InitConfig'.

2020/07/17 12:30:16 CLSRSC-594: Executing installation step 17 of 19: 'StartCluster'.

2020/07/17 12:31:39 CLSRSC-343: Successfully started Oracle Clusterware stack

2020/07/17 12:31:39 CLSRSC-594: Executing installation step 18 of 19: 'ConfigNode'.

2020/07/17 12:32:05 CLSRSC-594: Executing installation step 19 of 19: 'PostConfig'.

2020/07/17 12:32:25 CLSRSC-325: Configure Oracle Grid Infrastructure for a Cluster ... succeeded
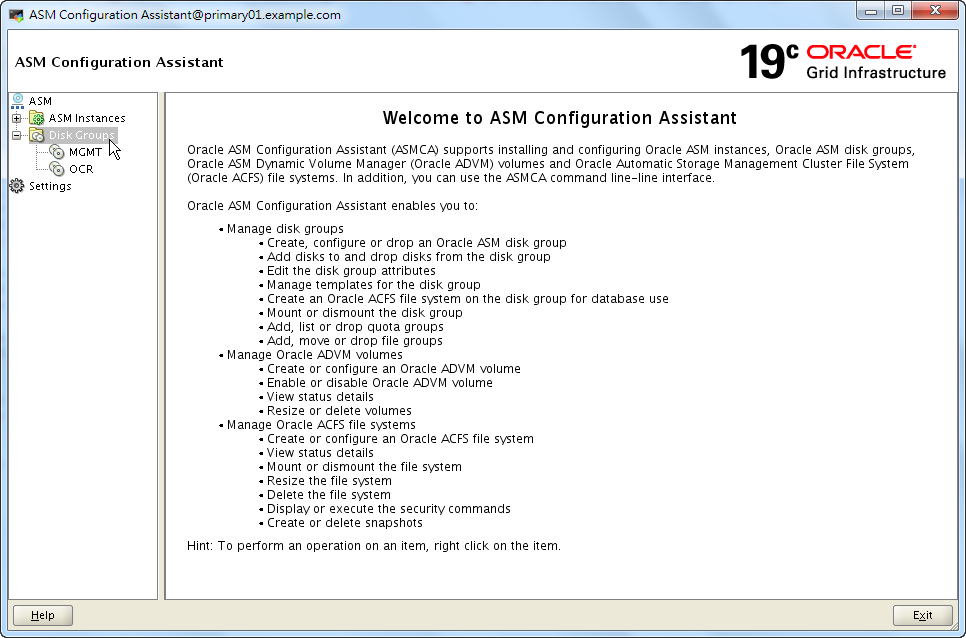
B. Create Disk Group DATA
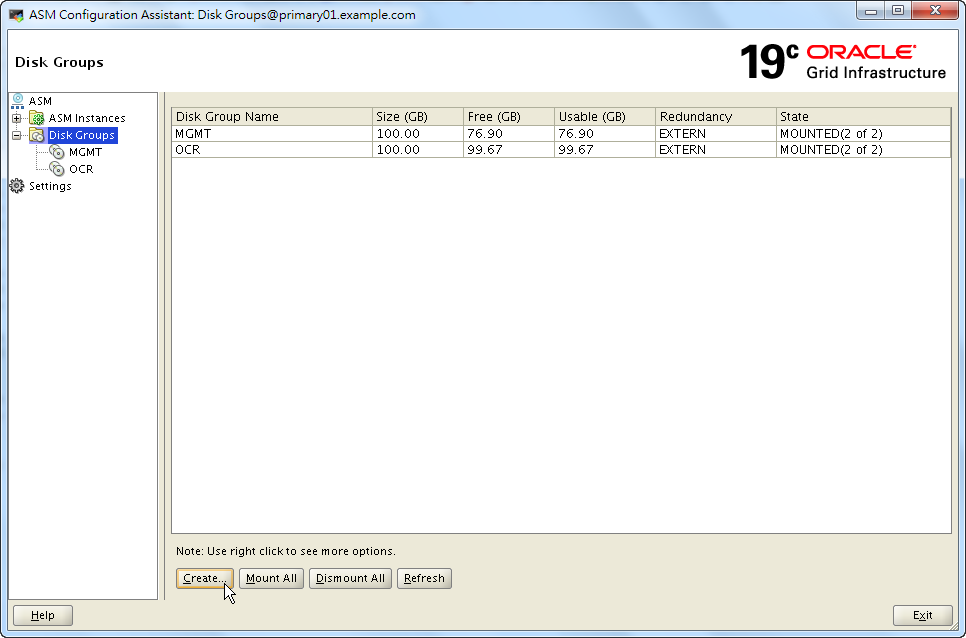
We have created OCR and MGMT two disk groups, but we have not created a disk group for databases yet. Let's do it now by ASM Configuration Assistant (ASMCA).

Be careful, NORMAL redundancy will cut the life of disk space into a half. I really don't think it's a good idea to build any kind of redundancy in ASM according to modern technology of storage devices. We should let the storage to play its role.
Sometimes, cutting the life of disk space into a half could be very serious, because there's no direct way to change a disk group from NORMAL back to EXTERNAL. For example, we expected one high-end storage to serve databases for at least 6 years, because of the factor of NORMAL redundancy, we can only use it for 3 years.

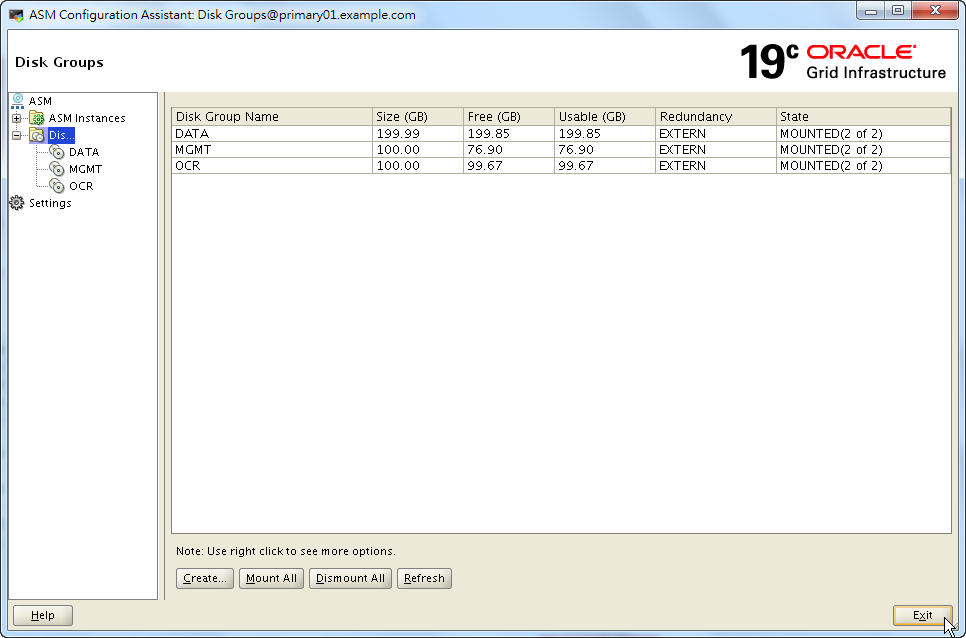
A disk group DATA has been created.
Next, we can safely install Oracle database 19c software.